


Nail painting is an art form that has become increasingly popular in recent years. Not only is it a way to express your creativity, but it's also a way to pamper yourself and show off your style. With so many nail paint designs and colours available, it can be overwhelming to know where to start. This article will provide you with creative nail paint techniques to master, covering everything from gradient nails to DIY nail paint mixes. With many techniques and styles to choose from, anyone can become a nail art aficionado.
Introduction to Nail Paint Innovation
From minimalist designs to intricate patterns, nail art trends are as diverse as they are stunning. Some of the trending designs include geometric patterns, floral prints, and abstract art. The beauty of nail art lies in its versatility - there’s a nail paint design for every mood and occasion.
To create these designs, you’ll need some essential tools. These include nail paints of various colours, a base coat, a top coat, nail art brushes, dotting tools, sponges, and tweezers. With these tools at your disposal, you’re ready to dive into the world of nail art.
Technique #1: Gradient Nails

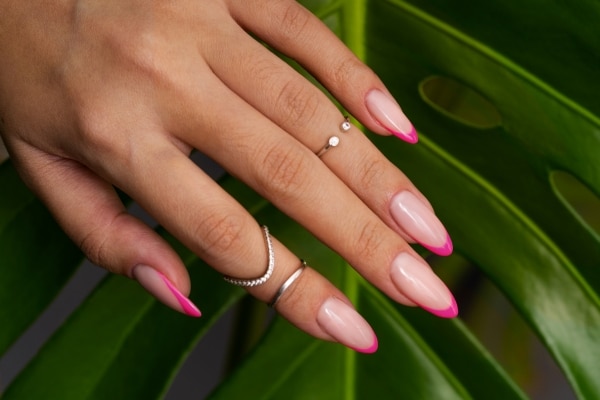
Creating a gradient effect on your nails might seem daunting, but you can achieve a flawless look with a little practice. Start by applying a base coat. Then, on a sponge, apply two or more nail paints side by side and dab it onto your nail. Repeat until you’re satisfied with the intensity. Finish with a top coat to smooth out any texture and add shine.
When it comes to gradients, the possibilities are endless. For a subtle look, use different nail paint shades of the same colour. For something more dramatic, try contrasting colours. Remember, a smooth transition between colours is the key to a stunning gradient.
Try out adding a touch of sparkle on the tips of your nails with the Lakmē Glitterati Collection Shine Nail Colors that dry in a flash, offering your nails an enduring and enchanting glossy radiance. With a spectrum of vibrant hues, these nail paint shades stand strong amidst your hectic routine, delivering a brilliant sheen that lingers.
Technique #2: Stamping Artistry
Nail stamping is a technique in which you use a rubber stamp to apply a design to your nails. To get started, you'll need a stamping plate, a scraper, and a stamping polish. Apply the polish to the design on the plate, scrape off the excess, and stamp the design onto your nails.
You can layer different stamping patterns or combine stamping with other techniques for intricate nail paint designs. You can also use a small brush to touch up any areas that didn't transfer properly. Remember to clean your stamping plate between uses to ensure a crisp design.
Technique #3: Marbling Magic

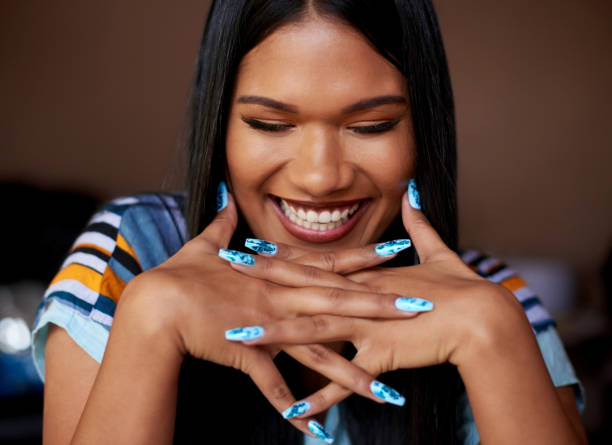
Marbled nails are a unique and eye-catching nail paint design that's easy to achieve with nail polish. Start by applying a base coat, then drop a few different colours onto your nails. Use a toothpick or a small brush to swirl the colours together until you achieve your desired look.
While marbling, it’s important to work quickly, as the nail paint colour can dry on the water’s surface. The best results can be achieved using room-temperature water and nail paints with a runny consistency.
Technique #4: Use of Stencils and Decals
Stencils and decals are an easy way to add intricate designs to your nails. To use stencils, apply a base coat and let it dry. Then, place the stencil onto your nail and apply a contrasting colour over it. Remove the stencil to reveal the design.
Decals are another way to add intricate designs to your nails. They come in a variety of designs and are easy to apply. You can also layer decals over different base colours for a unique look.

Technique #5: Matte and Glossy Finishes

Matte and glossy finishes can be combined to create a modern and textured look. Start by applying a base coat and letting it dry. Then, apply a matte nail paint topcoat over the entire nail. Use a glossy topcoat to paint a design over the matte finish, like stripes or dots.
For a modern look, try combining matte and glossy finishes. You can do this by applying a matte top coat over your nail paint colour and then add glossy dots or stripes.
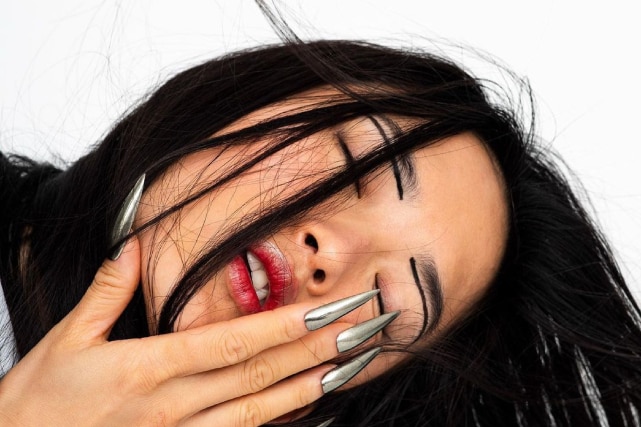
You can also use the Lakmē Ultimate Glam Chrome Nail Paints if you are looking for something sassy. These jewel-toned colors radiate with rich pearlisation and deliver an intense metallic finish, giving your nails an edge for every look. From classic vibes to daring pops, this collection embodies the essence of 'metallic chic' with a touch of drama. Each shade is perfect for adding flair with chrome tips or making a bold statement with metallic nails.
Technique #6: DIY Nail Paint Mixes
Don’t have the exact nail paint colour you want? Try mixing different nail paints to create your custom colour. Just make sure to mix enough to complete your design as it can be hard to recreate the exact same colour.
You can also create textured nail paints by adding materials like glitter or sand to your nail paint. This can add a fun and unique element to your nail paint designs.
Maintenance and Longevity of Nail Paint
To prolong your manicure's life, apply a base coat before your nail paint and a top coat after. Reapplying the top coat every few days can also help prevent chipping.
If your nail paint chips, don’t worry. You can fix it by gently buffing the chip and applying a new layer of nail paint and top coat.
With these techniques in your arsenal, you’re well on your way to becoming a nail art master. Remember, practice makes perfect, so don’t be discouraged if your first few attempts don’t turn out as expected. Happy painting!
FAQs about Nail Paint Techniques and Tips
Q1 How can I remove gel nail paint at home?
A: To remove your gel nail paint, soak your nails in acetone nail polish remover for 10-15 minutes to remove gel nail paint at home. Once the gel has softened, gently scrape it off with a cuticle pusher or nail file. Be sure to moisturise your nails afterwards to prevent them from becoming dry and brittle.
Q2 How can I create a long-lasting manicure?
A: To create a long-lasting manicure, start with a clean and dry nail bed. Apply a base coat to prevent staining and extend the life of your manicure. Apply two coats of nail polish, allowing each coat to dry completely. Finish with a topcoat to seal in the colour and prevent chipping. Be sure to reapply the topcoat every few days to prolong the life of your manicure.
Q3 How can I fix chipped nail paint without redoing my entire manicure?
A: To fix chipped nail paint without redoing your entire manicure, you can use a small brush and a matching nail polish colour to touch up the area. Simply apply the polish over the chipped area and let it dry. Be sure to apply a topcoat to seal in the colour and prevent further chipping.

 Privacy Notice
Written by Kinnari Ashar on 6th May 2024