


Have dull skin and do not want to dole out extra moolah at the salon? We have a home-based solution for you. Chemical peels at home! Yes, you can do the entire thing at home and get the same results that you get at your beauty parlour. Whether you want to lift your dull skin or you want to even out your skin tone by getting rid of light acne and scars, chemical peels at home is one solution that you should consider.
This one is an expert-recommended solution. So, once you get the hang of it, they can prove to be quite effective. Know your dos and don’ts, along with your skin texture and sensitivity and you’d be good to go. In this article, we will tell you all about how you can do chemical peels at home, safely.
- What is a chemical peel
- Chemical peels at home: Why should you go for it?
- Chemical peels at home: What are the different types?
- Chemical peel at home: The ingredients
- How to do chemical peel at home
- FAQs on chemical peels at home
What is a chemical peel

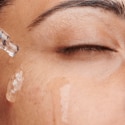
First things first, before knowing how to do a chemical peel at home, let’s know a little about it. A chemical peel, in essence, is a facial treatment wherein a chemical is applied on the skin to exfoliate it and get rid of dead cells.
While it is important to know the chemical peel process, it is also important to be aware of all the things that need to be done before the treatment and after the treatment. It is advisable to use good retinol creams in the weeks leading up to the treatment as it gives better and improved results. Further, avoiding sun exposure for at least a week is one amongst the few precautions that are recommended after using a chemical peel.
Chemical peels at home: Why should you go for it?

Our skin is affected by many things, internal as well as external. While the internal factors are mostly what we put into our bodies, exercise or the lack of it, external factors such as pollution and hectic routines also play a huge role. Our habits such as excessive smoking, caffeine, etc., and even genetic factors also influence your skin’s appearance. All of these things, when combined, affect our skin. As a result, premature ageing, fine lines and pigmentation occurs.
Chemical peels are an effective way of getting rid of it. It works gently towards exfoliating the outer layer which is affected by these factors, giving way to better and brighter skin that is even-toned. Chemical peels at home is a good option as you can do them in the comfort of your own home. Also, you can be more regular, once you get the hang of it.
Chemical peels at home: What are the different types?

You may think that there is just one variant in chemical peels, but there are actually quite a few ways in which you can use it.
Type 1: Superficial chemical peels
This one is the mildest form of chemical peels and works in multiple ways towards making your skin better. It is known to soften and smoothen dry skin, reduce pigmentation, soothe mild sun damage, get rid of blemishes, do away with the early signs of ageing, and more. Superficial chemical peels also have a shorter recovery period. This is basically a mild form of chemical peel that can be done on a regular basis and when you do not have any specific pressing skin concern.
Type 2: Medium chemical peels
This one, as the name suggests, is a middle form of chemical peel which is obviously a few steps ahead of the superficial one. If your skin has an array of concerns, not too pressing, but enough to worry you, then to save constant trips to the salon, you can try a medium chemical peel at home. This type of peel also has many benefits such as it gets rid of blemishes and even birthmarks, reduces fine lines and wrinkles drastically, gives way to more youthful skin, soothes dry skin, clears acne scars and pigmentation, and more.
Type 3: Deep chemical peels
Now comes the most extensive form of chemical peel, the deep one. Unlike the previous two, this is mostly a one-time procedure which has lasting effects. You can ask the expert whether or not you need a follow-up session. A deep chemical peel is extremely effective when you wish to get rid of precancerous growths, eliminate acne scars and deep-seated pigmentation, get rid of heavy wrinkles and age spots, and an overall long-term result.
Most of the time, chemical peels at home involve superficial peels and even medium chemical peels at times. A deep chemical peel treatment is purely a professional process and should not be attempted at home.
Chemical peel at home: The ingredients

The ingredients for a home clean-up or facial are pretty clear. But what about those for a chemical peel at home? The components required are quite different and if you want to pull this off well, you should know what exactly is going on with your skin and how the individual components benefit you.
1. Enzyme peels
These are little shots of nutrition boosts, given it is a mix of fruit enzymes. These are the gentlest ones that refine skin pores and exfoliate it without any harsh effects. If you have sensitive skin and are not comfortable with other forms of acids, you should pick this one.
2. Salicylic acid
Looking for a good chemical peel that can get rid of your acne? This is the most important ingredient that you should get. Salicylic acid unclogs pores by going deep into the skin and helps with skin conditions such as melasma, hyperpigmentation and freckles. Further, this acid will not make the skin sun-sensitive.
3. Mandelic acid
Want the focus of your chemical peel on the ageing effects? Then this is the ingredient to go for as it is quite effective in getting rid of dead skin cells, at the same time working efficiently on the signs of ageing and hyperpigmentation. Mandelic acid works well when combined with salicylic acid.
4. Lactic acid
This is another mild ingredient which is rich in AHAs, i.e. alpha hydroxy acids. This is a good option if you are just starting out with chemical peels as these are quite delicate on the skin and yet do a fine job of exfoliating and cleaning up. It also treats fine lines and mild wrinkles and evens out the skin tone, and at the same time hydrates the skin.
5. Glycolic acid
This is one of the more potent ingredients and can be used, both in superficial and medium chemical peels at home, depending on which one you are going for. Further, on the basis of the effect and intensity, you can change the proportion that you use. Again, this is good for getting rid of stubborn scars and also helps with ageing signs.
6. TCA peels
Also known as trichloroacetic peels, these peels are extremely strong. So, be cautious while using this as you attempt this chemical peel at home. That being said, it is excellent if you wish to get rid of that sunburn and treat that hyperpigmentation, or even those stretch marks and other scars.
7. Jessner’s peel
This one’s a particularly different form of peel. It is actually a mix of three ingredients; salicylic acid, resorcinol and lactic acid, and combines the best of all three components. This is the best choice if you wish to gradually get rid of acne, the resultant scars, and hyperpigmentation and blemishes. The only problem with this ingredient is that it makes the skin extremely dry. So, depending on your skin type, keep a moisturiser handy.
How to do chemical peel at home

Now comes the crucial part; how to actually use chemical peels at home? You have all the relevant ingredients ready, you have consulted with your doctor and there are no complications, and you have everything at your disposal. But, how exactly to start? We will help you out.
Note: Do not forget to do a patch test of ingredients at least 24 hours before the actual procedure.
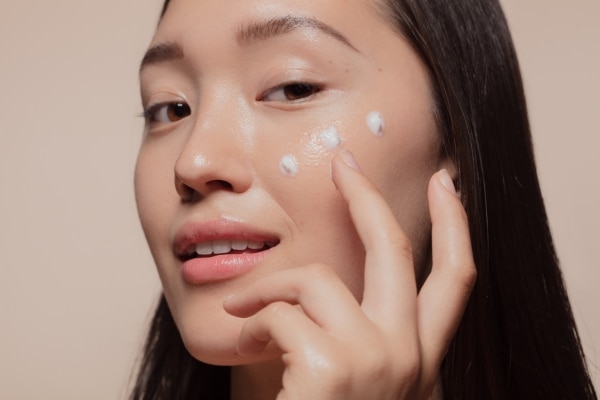
Step 1: Cleanse
The first step is to cleanse the face thoroughly and get rid of all the dirt, grime and impurities. Try using a gentle, soap-free, sulfate-free cleanser for the same
Step 2: Protect
Cover the sensitive areas on your face, such as your eyes, your nostrils and the lip corners. The acids can easily irritate the delicate skin in these places even if you do not have sensitive skin and you do not want that. You can apply a thin layer of petroleum jelly and that would do the deed.
Step 3: Apply
Now apply the solution using a cotton swab or a cotton pad from less sensitive areas of the skin to more sensitive ones. We would suggest you apply it first on areas such as the forehead and cheeks and then move on to the smaller and more sensitive areas such as the nose and neck.
Step 4: Leave on
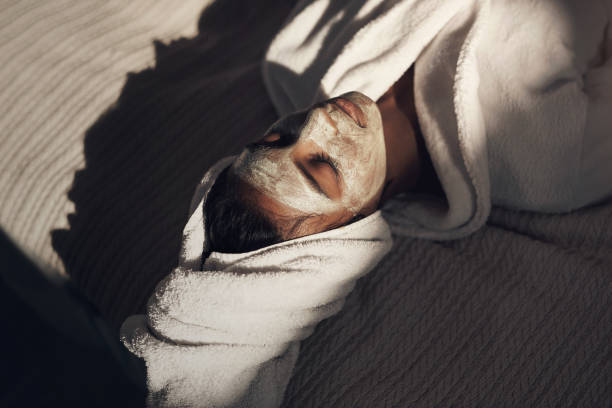
Leave the solution on your face for the recommended time. You can even remove it before the time but do not, in any case, keep it longer than the recommended amount of time.
Step 5: Remove
Again, as per the instructions stated, remove the peel gently. Apply a neutralising solution on your face. This is done so that the chemicals do not continue working extra on the skin and ruin it. The thing with chemical peel ingredients is that they are effective on the skin when used for the recommended duration. Hence, applying a neutralising solution ensures that you reap maximum benefits
FAQs on chemical peels at home

Q. Are there any side effects of attempting chemical peels at home?
A. Chemical peels, in general, may have certain side effects. If you have sensitive skin or are undergoing some sort of treatment, it is better to consult a specialist and your own doctor before attempting this. Some of the side effects may include skin redness, which is normal. However, some of the more serious side effects may be in the form of scarring (if the instruments are not used correctly) and bacterial infections of the skin (if the healing does not happen properly).
Q. When should I not go for chemical peeling?
A. You should always consult a specialist or a doctor before going for a chemical peel, more so when you are going to do it yourself. Here are some of the cases when you should not attempt it:
- When you have a history of overgrowing scar tissues
- When you have a very deep complexion
- If you have an abnormal form of skin pigmentation
- If you have a history of cold sores
- If you get influenza and common cold too often
- If you have been taking acne medicine anytime in the last six months


 Privacy Notice
Written by Kadambari Srivastava on 23rd Dec 2021
A finance professional by degree who jumped into the world of content creation 7 years ago, Kadambari is a pro at spinning words, whether it's beauty, business, entertainment, or anything else. Better separate your 'its' from 'it's' when she is around. When she isn't writing, she can be seen with a cup of tea in one hand and a book in the other, keeping up with her book challenge of the year.