


Let’s accept it – regular pedicures can be one of the least prioritised beauty treatments ever. Most of us may get regular manicures but pedicures are something we save only for special occasions or for the time when our feet look absolutely gross.
Do you wonder how to do pedicure at home but don’t know where to begin? Well, worry not because we are about to tell you how to give yourself a super quick, simple yet highly effective pedicure at home. Isn’t that awesome? Let’s begin!
The Art of Pedicure: A Guide to Happy and Healthy Feet
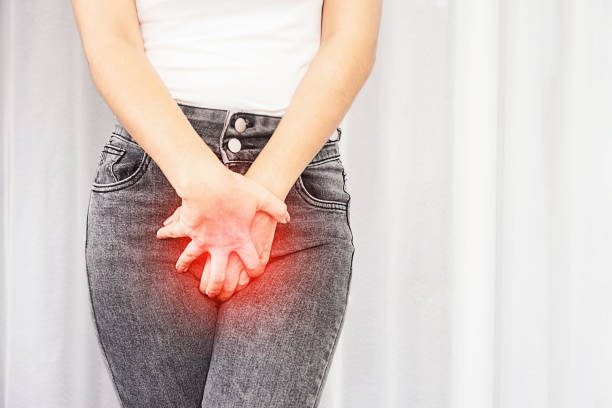
Pedicure is not just about making your feet look pretty; it is also about taking good care of them. Regular pedicure benefits from various foot problems such as calluses, corns, and ingrown toenails.
Neglecting your feet can lead to dry, cracked skin and other foot-related issues. When you take care of your feet, you improve their overall health, which allows them to function properly.
Let us talk about the essential pedicure steps
Essential Steps of a Pedicure
Step 1: Prep your nails

To ensure a clean, professional-level pedicure at home, it is really important to prep your nails. To do so, you need to start with properly removing all the remnants of that chipped nail polish that has been sitting on your nails since your last pedicure session. And even if you don’t have any nail polish on, it is important to go over each nail using your nail polish remover to get rid of any accumulated dirt or other impurities. This will help the nail polish that will follow to stay on a lot longer.
Step 2: Soak ‘em in

Once you’ve cleaned your toenails, it is time to soften the hard skin around your nails and on your feet by soaking them. To do so, fill a tub with warm water and put your feet in it for about 15 minutes. To elevate this calming experience further and to give your at-home pedicure a spa-like vibe, you could add in elements such as Epsom salt, vinegar or even an essential oil of your choice. This soaking time is a great way to catch up on some reading or video call a friend you’ve been meaning to for a while!
Step 3: Slough away the dead skin

The main point of the soaking is to soften the skin on your feet and make it easier and less harsh to scrub away the dead skin that may have accumulated on your feet and heels. So, once you take your feet out of the tub of water, gently yet thoroughly pat them dry. Next, grab that foot file or pumice stone and rub it in a gentle back-and-forth motion over your feet and any other hardened area to slough away all the dirt and dead skin. An important thing to keep in mind when scrubbing your feet is that you need to scrub enough to remove the dead skin and not scrub till your feet feel raw.
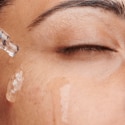
Use Love Beauty and Planet Turmeric & Moringa Body Scrub to buff away the dead skin cells from your feet. Let the blend of Turmeric, Natural Clay, Apricot, and Moringa exfoliate, detoxify, and leave your feet glowing. Turmeric, known for its brightening properties, imparts a super luminous glow. Natural Clay, celebrated for mild exfoliation, detoxifies and reveals your feet’s true radiance.
Step 4: Cut your nails

It is time to shift your focus onto your nails. An important thing to keep in mind when doing your pedicure at home is that you need to invest in good quality pedicure tool kit such as clippers, files and buffers. So, grab your nail clipper and trim your nails to the length you want. Don’t worry about cutting them in a particular shape, as that’s something your nail filer will take care of in the next step. All you need to do is ensure that you don’t cut your nails too short as that may cause stinging due to overexposed skin.
Step 5: Shape your nails

This is the step in your at-home pedicure where you need to decide whether you want your toenails to be square or more rounded at the edges and then shape them with your nail file accordingly. While filing your nails, ensure that you do so in a single, long swift motion instead of several small strokes as that can harm the topmost enamel, making your nails brittle and chip more easily. After you’ve filed your nails to the desired shape, grab your nail buffer and very gently buff your entire nail bed to even out the surface and get rid of uneven edges, if any. This will ensure that the nail polish will go on smoother.
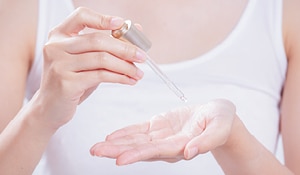
Step 6: Use a bit of cuticle oil

This may be quite an underrated product, but trust us, it’s a game-changer for keeping your nails strong and healthy. So, after you’ve trimmed, filed and buffed your nails, gently push your cuticles using a popsicle stick if you don’t have the right pedicure tools and then apply a bit of cuticle oil to the skin around your nails to protect them as well as ensure that your pedicure lasts longer.
Step 7: Time for a quick massage

Once your nails have been taken care of, you must now focus your attention on massaging your feet. Take a tiny amount of foot cream (you can always use a rich body lotion if you don’t have foot cream) and apply it all over your feet, between your toes and calves. Massage the product into your skin to not only hydrate it but also pamper it a little bit after that thorough soak-n-scrub you put them through.
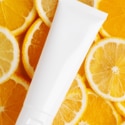
Revitalise your skin with Love Beauty and Planet Murumuru Butter & Rose Delicious Glow Body Lotion. Infused with Amazonian Murumuru butter, this vegan lotion provides deep nourishment, leaving your skin irresistibly soft and radiant. The non-sticky formula ensures a comfortable feel throughout the day, making it an ideal part of your daily skincare routine.
Step 8: Apply a layer of base coat to your nails

How often do you skip applying a base coat while doing your manicure or pedicure at home? Most of us think of applying base coats as pointless, but they are anything but that. Apart from ensuring that your nail polish lasts longer, it also acts as a barrier between your nails and the nail polish to help maintain the health of your nails.
Step 9: Go ahead and paint your nails

This step has to be everyone’s favourite part when doing their pedicure at home, isn’t it? Once your base coat has completely dried off, apply at least two coats of any nail colour of your choice. Apply the polish in long, even strokes and avoid going over it until each layer has completely dried to give your nails a beautiful, professional finish.
Step 10: Finally, apply a top coat

Another important step for a long-lasting pedicure is applying a top coat without fail. Once your nail polish has dried down, apply a thin layer of topcoat to seal everything in place.
And with that, your professional at-home pedicure session comes to an end!
FAQs About Mastering Foot Care
Can I do a DIY pedicure at home?
Yes, a DIY pedicure is possible. Soak your feet, trim your nails, exfoliate, and moisturize. Ensure proper hygiene to prevent infections.
How can I address dry or cracked heels?
Regular moisturizing, especially after a bath or shower, helps prevent dryness. Use a pumice stone or foot file to gently remove dead skin and consider overnight moisturising treatments.
How can I prevent and treat ingrown toenails?
Trim your toenails straight across, not too short. Avoid tight shoes and socks. If you notice signs of an ingrown toenail, soak your foot in warm water and seek professional help if needed.


 Privacy Notice
Written by Kinnari Ashar on 19th Jan 2024